Post by J.T.Woody on Nov 3, 2005 16:09:27 GMT -3
This is done to get rid of the lousy stock YJ flares which really hamper wheelwell-to-tire clearance of larger than stock tires on lifted rigs. It is possible to gain atleast 1-2"more inches of room over stock.
If you read on, I stress the importance of measure, measure, measure! You don't want to keep making cuts into the sheetmetal because there isn't a whole lot of room for error here. I am also not liable for anyone screwing up their rig
Here we go....
When I installed my TJ flares 3 weeks ago...it took me 3.5 hours to do each one. Of course, the tools I used were in less than stellar condition :brickwall . My borrowed sawzall kept ejecting the blades every 20seconds.
I used the original screws and plastic nuts that held my stock flares on. You will need to trim some of the TJ flare off to make the flares fit properly, including the Locating tabs.
Rear TJ flares:
Remove the inner fender liner inside the wheel wells. They are held in by screws.
Remove the stock flare.
Take several pairs of C-clamps (or vice-grips) and clamp the TJ flare in place at the BOTTOM. The top will flap around a bit. You will see where you need to trim the sheetmetal and also the sections of the TJ flare that need to be removed. On mine, I just needed to trim the flare at the front of the wheelwell. Next, get a paint marker, grease pen, anything to make a mark that is plainly visible to you.
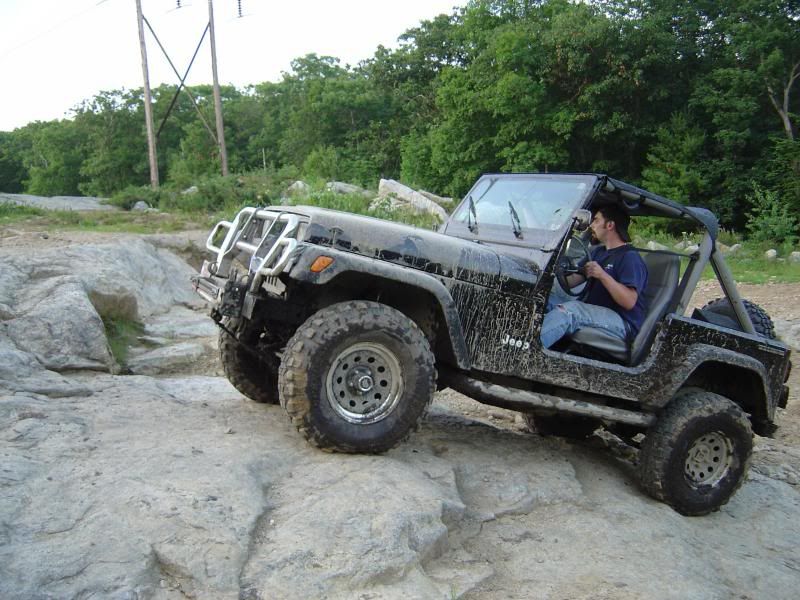
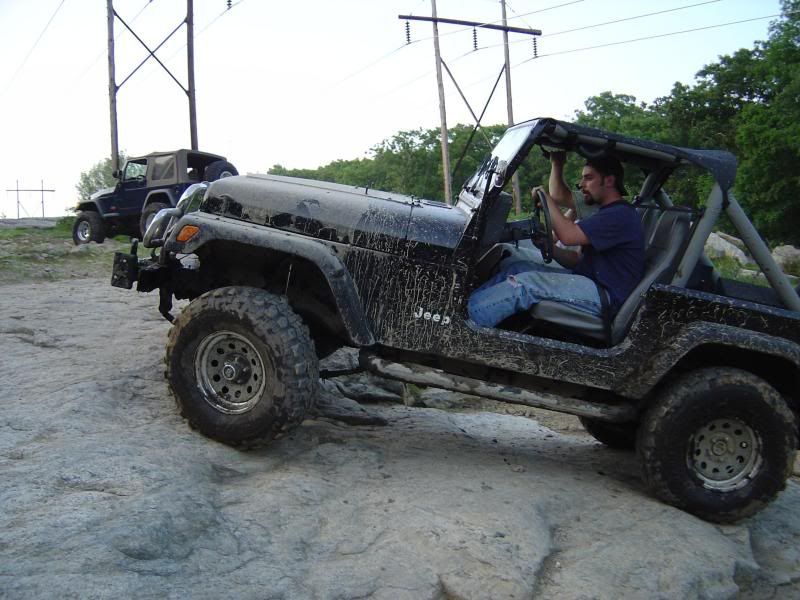
Placement of the flare is critical at this point. If you stick your hand up inside the wheelwell, you will feel the two pieces of metal where the outer quarter panel is welded to the inner tub. If you cut too far up, the body could become separated at this point. I made my cut RIGHT up to the bottom of this area, not cutting into the double-panelled section. As for the placement of the flare, the rear section will hang down about 1/2" lower than the bottom of the body, and the vertical seam in the body will line up with the pointed tip of the flare. I know...not so easy to explain, but you'll see what I mean when you get to it. You can KIND OF SEE it in the rear 3/4 picture.
The front of the rear flare will be somewhere between 1/8" and 1/4" below the bottom of the rocker panel. I found it easier to get the rear lined up and clamped first, then position the front of the flare so the flare looks straight.
NOW, after making sure the flare looks proper where you have it clamped, take your paint marker/ grease pencil and trace the edge of the flare onto the sheetmetal. This is the line you will be cutting. YOU CANNOT CUT THE FRONT OF THE REAR WHEELWELL! This is why it is important to remove the forward section of the fender flare lip on the inside.
Remove the clamps, and cut away the sheetmetal. After cutting, place the flare back into position, clamp it, and make sure you do not need to cut any more metal. The flare should fit flush to the sheetmetal on the body now. If everything looks good to you, get your trusty paint marker and locate the correct mounting holes in the flare. Make your marks through the holes in the flare, remove flare again, and start drilling the holes you marked. I started with a 1/8th" bit and worked up to whatever size the stock holes were in the body. Mask up the area, sand/prep the entire area ( I masked off around the new drilled holes) and paint with whatever you feel like. Just make sure all bare metal is protected!
Wait until the paint is dry to reinstall your flare. Now, REPEAT for the other side! :brickwall
The front flares are a bit harder to trim for....
Front TJ flares :
Now, I am sure there are several methods of doing the front flares, but what I did on the driver's side is the way I recommend doing... On the passenger side, I trimmed the fender away and at the back is double-walled. Obviously, the way I trimmed removed the Spot welds that hold the panels together. WHOOPS! :brickwall Don't do it that way.
Remove stock flares. Trim away the Locating tabs on the TJ flares.
Clamp the flare in place at the bottom in the rear and wherever you can get a grip in the front. Again, proper placement is key, here! The top of the flare on mine is lined up with the top edge of the fender, and in the front, the bottom of the flare hangs off by a finger's width (sorry, can't remember the measurements!).
The rear of the flare will hang off by the same amount as the Rear flares do, between 1/8th" and 1/4". I am sure some Jeeps vary. Now, get your paint marker and make the lines where you need to cut.
Remove the flare and you should notice that the line you drew at the rear of the flare coincides with the seamof the inner fender well.
NOW, this is where it gets strange....Instead of cutting that sheetmetal away, make several cuts with your tool of choice to allow the sheetmetal to be bashed in. I made several cuts in the rounded section, about 5" apart from each other, then moved on down the line, cutting until the cut was equal to the inner seam (once you have it apart, you will see what I am talking about).
After this is accomplished, get your BFH (big effin hammer) and tap the metal inwards, folding it in towards the inner fender well. Make sure you are not buckling the outer fender sheetmetal (a little is ok, as long as the flare will cover it). From this point, it will be Trial-and Error. You will need to be very careful as there is not a ton of room for mistakes here.
Now, you will need to continue trimming the sheetmetal for the rest of the flare. Also note...when you get to the thinnest point of the fender, located right above the tire, you will see how the fender was trimmed to fit the tire. DO not remove too much of this section. The TJ flare will need to be extensively trimmed at the same area.
After your trimming is done and the fender flare fits the way you want, you need to make the same spots for the screws and hardware as you did for the Rear flares. The back section of the flare will be attached through the inner engine compartment. I was able to loosen the Radiator flow bottle and the washer bottle on the driver's side and fit my arm down there. Yes, it is a bit tight, but possible. On the passenger's side, your arm will fit much better.
Then, mask, sand, prep and paint the work areas like you did earlier. Reinstall flares, and you may need to extend the wiring harnesses for the corner lights. You may also want to get new pigtail wiring, as the YJ ones don't fit perfectly. I just took my Dremel-like tool and cut off 2 of the 4 rubber tabs to allow the end to tighten into the lens.
The reason I chose to reuse the TJ flare mount holes is in the case of future additions...say I wanted to install TJ 6" flares...the holes will line up perfectly and such.
I hope this write-up helps some. I am sure I made it more difficult, but I am pretty anal when it comes to my projects. :thumbsup:
Sorry I do not have any close-ups, but you get the idea.

If you read on, I stress the importance of measure, measure, measure! You don't want to keep making cuts into the sheetmetal because there isn't a whole lot of room for error here. I am also not liable for anyone screwing up their rig

Here we go....
When I installed my TJ flares 3 weeks ago...it took me 3.5 hours to do each one. Of course, the tools I used were in less than stellar condition :brickwall . My borrowed sawzall kept ejecting the blades every 20seconds.

I used the original screws and plastic nuts that held my stock flares on. You will need to trim some of the TJ flare off to make the flares fit properly, including the Locating tabs.
Rear TJ flares:
Remove the inner fender liner inside the wheel wells. They are held in by screws.
Remove the stock flare.
Take several pairs of C-clamps (or vice-grips) and clamp the TJ flare in place at the BOTTOM. The top will flap around a bit. You will see where you need to trim the sheetmetal and also the sections of the TJ flare that need to be removed. On mine, I just needed to trim the flare at the front of the wheelwell. Next, get a paint marker, grease pen, anything to make a mark that is plainly visible to you.
Placement of the flare is critical at this point. If you stick your hand up inside the wheelwell, you will feel the two pieces of metal where the outer quarter panel is welded to the inner tub. If you cut too far up, the body could become separated at this point. I made my cut RIGHT up to the bottom of this area, not cutting into the double-panelled section. As for the placement of the flare, the rear section will hang down about 1/2" lower than the bottom of the body, and the vertical seam in the body will line up with the pointed tip of the flare. I know...not so easy to explain, but you'll see what I mean when you get to it. You can KIND OF SEE it in the rear 3/4 picture.
The front of the rear flare will be somewhere between 1/8" and 1/4" below the bottom of the rocker panel. I found it easier to get the rear lined up and clamped first, then position the front of the flare so the flare looks straight.
NOW, after making sure the flare looks proper where you have it clamped, take your paint marker/ grease pencil and trace the edge of the flare onto the sheetmetal. This is the line you will be cutting. YOU CANNOT CUT THE FRONT OF THE REAR WHEELWELL! This is why it is important to remove the forward section of the fender flare lip on the inside.
Remove the clamps, and cut away the sheetmetal. After cutting, place the flare back into position, clamp it, and make sure you do not need to cut any more metal. The flare should fit flush to the sheetmetal on the body now. If everything looks good to you, get your trusty paint marker and locate the correct mounting holes in the flare. Make your marks through the holes in the flare, remove flare again, and start drilling the holes you marked. I started with a 1/8th" bit and worked up to whatever size the stock holes were in the body. Mask up the area, sand/prep the entire area ( I masked off around the new drilled holes) and paint with whatever you feel like. Just make sure all bare metal is protected!
Wait until the paint is dry to reinstall your flare. Now, REPEAT for the other side! :brickwall

The front flares are a bit harder to trim for....
Front TJ flares :
Now, I am sure there are several methods of doing the front flares, but what I did on the driver's side is the way I recommend doing... On the passenger side, I trimmed the fender away and at the back is double-walled. Obviously, the way I trimmed removed the Spot welds that hold the panels together. WHOOPS! :brickwall Don't do it that way.
Remove stock flares. Trim away the Locating tabs on the TJ flares.
Clamp the flare in place at the bottom in the rear and wherever you can get a grip in the front. Again, proper placement is key, here! The top of the flare on mine is lined up with the top edge of the fender, and in the front, the bottom of the flare hangs off by a finger's width (sorry, can't remember the measurements!).
The rear of the flare will hang off by the same amount as the Rear flares do, between 1/8th" and 1/4". I am sure some Jeeps vary. Now, get your paint marker and make the lines where you need to cut.
Remove the flare and you should notice that the line you drew at the rear of the flare coincides with the seamof the inner fender well.
NOW, this is where it gets strange....Instead of cutting that sheetmetal away, make several cuts with your tool of choice to allow the sheetmetal to be bashed in. I made several cuts in the rounded section, about 5" apart from each other, then moved on down the line, cutting until the cut was equal to the inner seam (once you have it apart, you will see what I am talking about).
After this is accomplished, get your BFH (big effin hammer) and tap the metal inwards, folding it in towards the inner fender well. Make sure you are not buckling the outer fender sheetmetal (a little is ok, as long as the flare will cover it). From this point, it will be Trial-and Error. You will need to be very careful as there is not a ton of room for mistakes here.
Now, you will need to continue trimming the sheetmetal for the rest of the flare. Also note...when you get to the thinnest point of the fender, located right above the tire, you will see how the fender was trimmed to fit the tire. DO not remove too much of this section. The TJ flare will need to be extensively trimmed at the same area.
After your trimming is done and the fender flare fits the way you want, you need to make the same spots for the screws and hardware as you did for the Rear flares. The back section of the flare will be attached through the inner engine compartment. I was able to loosen the Radiator flow bottle and the washer bottle on the driver's side and fit my arm down there. Yes, it is a bit tight, but possible. On the passenger's side, your arm will fit much better.
Then, mask, sand, prep and paint the work areas like you did earlier. Reinstall flares, and you may need to extend the wiring harnesses for the corner lights. You may also want to get new pigtail wiring, as the YJ ones don't fit perfectly. I just took my Dremel-like tool and cut off 2 of the 4 rubber tabs to allow the end to tighten into the lens.
The reason I chose to reuse the TJ flare mount holes is in the case of future additions...say I wanted to install TJ 6" flares...the holes will line up perfectly and such.
I hope this write-up helps some. I am sure I made it more difficult, but I am pretty anal when it comes to my projects. :thumbsup:
Sorry I do not have any close-ups, but you get the idea.